The L1 Staking Wallet
The L1 Staking Wallet is a fork of the same wallet used by Avalanche when we launched our initial fork of the network at Testnet in January 2023, though we are planning to integrate future node, validating, and staking access points with the LAMINA1 Hub.
One of our goals for the launch of the LAMINA1 Betanet was to streamline the user experience of tools like this — but with a little effort, the L1 Staking Wallet is pretty easy to understand.
NOTE:
The L1 Staking Wallet is temporary, and its features will eventually be fully integrated into the LAMINA1 Hub. For this reason, you should only set up an L1 Staking Wallet if:
- You are an official Partner Validator with LAMINA1
- You are a Community Validator or want to run read-only node on Betanet
- You'd like to Delegate for an existing Validator node
- You would like to link Betanet to your previous Testnet account
Creating an L1 Staking Wallet
The L1 Staking Wallet will guide you through the steps needed to set up your staking account. For convenience, we will also walk you through the process here and add additional context and information where helpful.
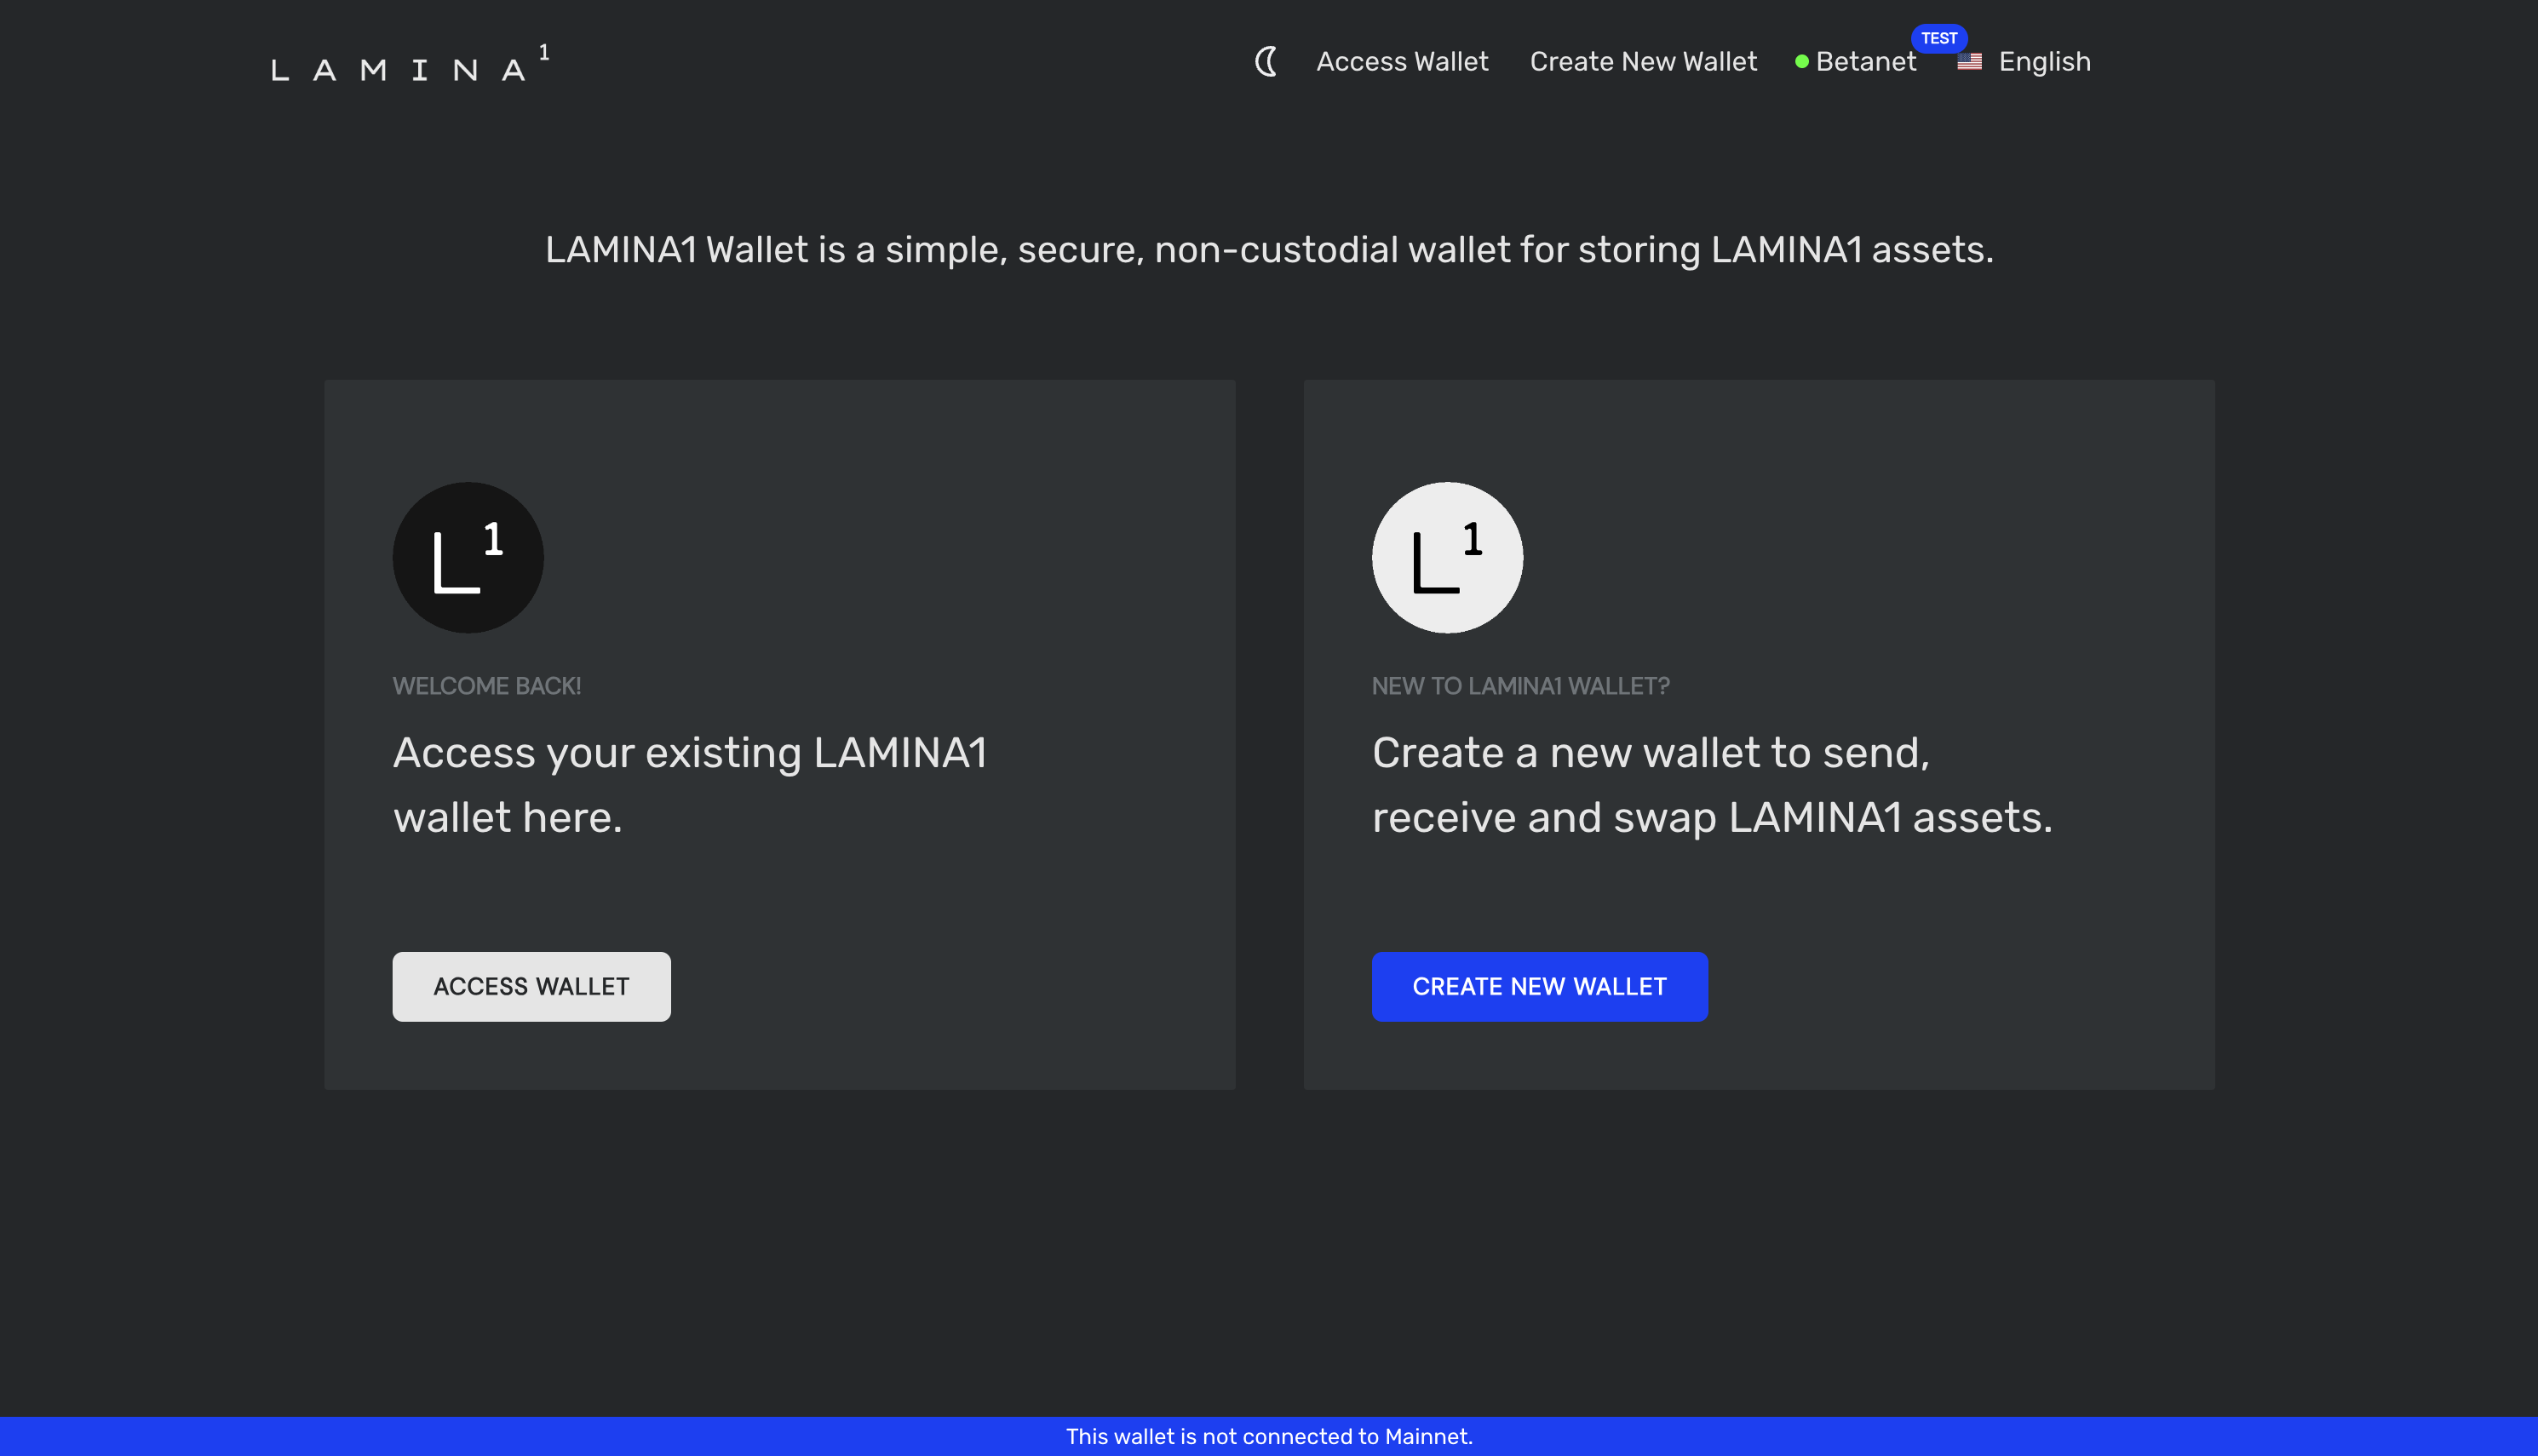
Start by visiting https://staking.lamina1.com in your browser. Once you’re at the landing page select WALLET. When the wallet opens we’re going to select CREATE NEW WALLET and then GENERATE KEY PHRASE.
You should now be looking at a grid of 24 words that make up your recovery key phrase. This is essentially the master password for your wallet and anyone who gets a hold of it has full access to anything in your wallet. While it’s a pain, one of the safest ways to record this information is with a paper and pen and store it in a safe or other secure location. Electronic devices are popular targets for people to attack looking for crypto keys so taking a photo or copy & pasting the information may be risky. Also note that if you lose this information, it may be impossible to get back into your wallet. Once you’ve written down the words and their corresponding numbers, click the checkbox and ACCESS WALLET.
The app will test that you recorded the recovery phrase by asking for a few of the words. Select them to proceed. If successful you’ll see a green check mark, click ACCESS WALLET.

Congratulations, you’ve created your L1 Staking Wallet! From here you’ll be able to see your L1 balance and assets (if you have any) on the X, P, and C chains. At this stage, we recommend you save your private key so that you don’t have to use your recovery phrase every time you want to access your wallet.
Recommended next steps:
- Save private key
- Export private key and import to Metamask
Saving Your Private Keys
The L1 Staking Wallet does not save your private key by default so if you want to avoid entering your private key or recovery phrase every time you use it, you should consider saving it. To do this, you’ll first need to have your wallet set up within the Staking Wallet. If you can see a section that says Balance at the top of the Staking Wallet then you’re all set to continue to the next section, otherwise you’ll need to access your wallet by importing the recovery phrase or using a private key.
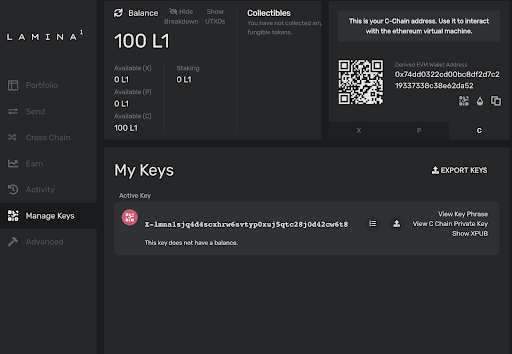
Once your wallet is set up, go to the MANAGE KEYS section where you should see a screen that looks like this:

From here are two primary ways to save your Staking Wallet. You can do both if you choose.
Save to Browser
This approach works like a login by encrypting and saving your private key within the browser. Later, when you come back to the Staking Wallet within the same browser, you can easily access your wallet using just the password you set up. This approach only works when accessing the Staking Wallet from the same computer and browser every time. If you need an approach that you can take to different computers or browsers, then consider also creating a keystore file.
To do this, follow the instructions above until you’re at the MANAGE KEYS section of the Staking Wallet. From here, click on the SAVE KEYS button with the yellow caution symbol. The Staking Wallet will ask you to enter an account name and password.
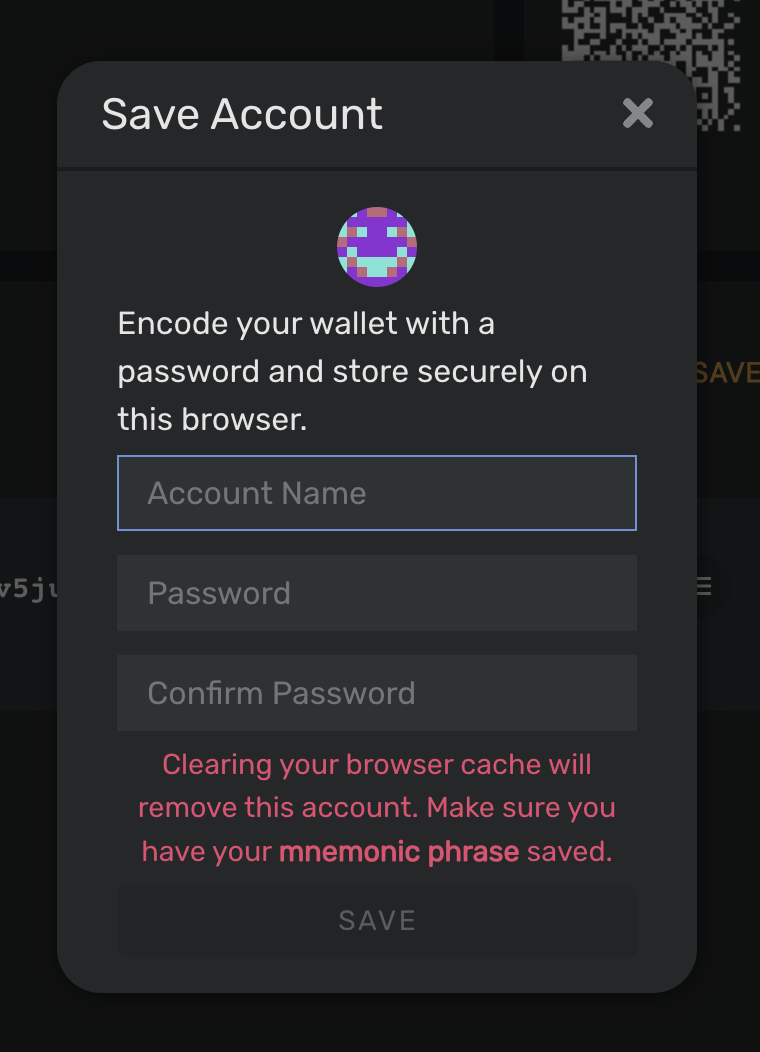
You can enter whatever you’d like for the account name — this is saved locally so no one else will see it unless they’re on your computer. Your password should be strong and not re-used from somewhere else. If anyone gets the password and access to your computer, they’ll have complete access to your wallet. We generally recommend you use a good password manager. PAY ATTENTION TO THE WARNING on this screen. You must still secure your recovery phrase somewhere in case your browser cache is cleared or you lose access to the computer. Nobody can help you recover this username and password if you lose your recovery phrase.
Once you enter a valid username and password and press SAVE, you’ll be returned to the MANAGE KEYS page. If it was successful you should see your new username in the lower left corner of the wallet (if on desktop). If you click on your username you can change your password or delete the account from the browser. Your account is now saved to your browser.
The next time you visit the L1 Staking Wallet you should see your local accounts at the top of the list.
Save to Encrypted File
Creating an encrypted keystore file is a convenient way to create a portable backup of your private key that you can take to other computers or browsers. This keystore file will be encrypted with a regular password, so make sure the password is not easily guessed and make sure you don’t lose or forget it.
To begin, make sure you’re logged into your account in the L1 Staking Wallet and go to the MANAGE KEYS section. From here, click on the EXPORT KEYS button where you will be prompted for a password. Again, make sure the password is not easily guessed and make sure you don’t lose or forget it. Password managers are highly recommended.
Once you enter and confirm your password, you should download a .json file. This file is your encrypted key store and can be used to recover your account from any computer or browser. As long as you’ve used a secure password, it should be relatively safe to store on your computer, send via email, or backup on a USB stick or backup drive.
Linking to an Existing Wallet or LAMINA1 Hub Account
If you don’t want to set up a new wallet to access Betanet validating, staking & delegating capabilities, the L1 Staking Wallet also allows import of an existing wallet via multiple methods, some of which are detailed below.
Export via the LAMINA1 Hub
To use your existing LAMINA1 Hub address to set up a new L1 Staking Wallet:
- Connect to the LAMINA1 Hub using your preferred login method
- On the 'Settings' Page, go to the 'Account Management' section and select "Export Private Key."
- Go to the L1 Staking Wallet and use the private key you just exported from the Hub to open up your account.
Note that if you link your LAMINA1 Hub and L1 Staking Wallet through the same Metamask wallet during set-up, they will also be connected. You can also choose to keep your LAMINA1 Hub account and L1 Staking Wallet separate, and simply transfer assets between them, whichever you prefer.
Import via Private Key
The private key for your wallet can be used to gain access via the L1 Staking Wallet, for example if it was created in another client such as Metamask. Metamask private keys can be retrieved via Account Details by using the Export Private Key button and providing your Metamask password.
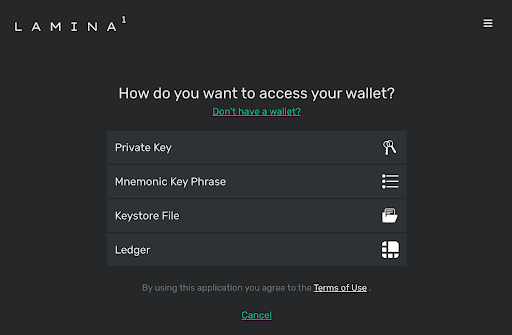
- On the intro screen, choose ‘Access Wallet’ and select the Private Key method.
- Enter your wallet private key when prompted and click Access Wallet. If your private key is valid, you will be directed to the main wallet dashboard.
Import via Mnemonic
The Mnemonic Key Phrase is the phrase that you securely stored during wallet creation if the L1 Staking Wallet was used. The phrase can be manually entered to regain access to your wallet.
- On the intro screen, choose ‘Access Wallet’ and select Mnemonic Key Phrase method.
- Enter all 24 words from the recovery phrase and click ‘Access Wallet’. If correct you will be directed to the main wallet dashboard.
Import via Keystore File
- On the intro screen, choose ‘Access Wallet’ and select Keystore File method.
- Click Select File and navigate to the .json format keystore file. If valid you will be directed to the main wallet dashboard.
Exporting From the L1 Staking Wallet
There are also multiple ways to backup your wallet from the L1 Staking Wallet interface, to ensure that you will always have access to your wallet & assets. These exported resources can be used in the Access Wallet section of the main page of the Staking Wallet.
Export C-Chain Private Key
- In the Staking Wallet interface, choose Manage Keys from the sidebar.
- On the “My Keys” page, click the “View C Chain Private Key” link. A modal will appear with your C-Chain private key, which is compatible with Ethereum-based wallet clients and can be used to import your wallet. Do not disclose this key, it provides full access to import your wallet and access Assets to anyone with access.
- As an example of how to use your private key for access, it can be entered in Metamask via the User Avatar icon → Import Account option and choosing the Private Key method.
Export Keystore File
Creating an encrypted keystore file is a convenient way to create a portable backup of your private key that you can take to other computers or browsers. This keystore file will be encrypted with a regular password, so make sure the password is not easily guessed and make sure you don’t lose or forget it.
- To begin, make sure you’re logged into your account in the L1 Staking Wallet and go to the MANAGE KEYS section.
- Click on the EXPORT KEYS button where you will be prompted for a password. Again, make sure the password is not easily guessed and make sure you don’t lose or forget it. Password managers are highly recommended.
- Once you enter and confirm your password, your browser should download a json file.
This file is your encrypted key store and can be used to recover your account from any computer or browser. As long as you use a secure password, it should be relatively safe to store on your computer, send via email, or backup on a USB stick or backup drive.
Using Metamask
Metamask is one of the most popular wallet apps for the Ethereum ecosystem and it’s also a browser extension which means you can use it to interact with any webapps that are integrated into the LAMINA1 platform. Using Metamask you can:
- Set up a wallet for any EVM compatible blockchain
- Send and receive currency within any EVM compatible blockchain
- Interact with web apps that have EVM functionality integrated (NFT marketplaces, decentralized exchanges, Web3 games, etc.)
Creating a New Wallet with Metamask
- First install the Metamask extension on your browser. If you already have Metamask, you can use your existing accounts and skip past the first 5 steps. Your Ethereum and other network balances will not be interoperable within the LAMINA1 Testnet (yet).
- Click through the prompts until it asks you to import or create a wallet. Click on “Create a Wallet” unless you already have a recovery phrase you want to use (go to the instructions for importing a wallet).
- Metamask will prompt you for a password. Make sure the password is not easily guessed and make sure you don’t lose or forget it as nobody can help you recover it. This password is not tied to an email or to your identity. It is stored locally on the browser and ensures that anyone who gains access to your computer can’t easily access your wallet without it.
- Next, you will go through the process of storing your secret recovery phrase. Metamask has a useful video and tips here that are worth paying attention to. In short, this is essentially the master password for your wallet and anyone who gets a hold of it has full access to anything in your wallet. While it’s a pain, one of the safest ways to record this information is with a paper and pen and store it in a safe or other secure location. Electronic devices are popular targets for people to attack looking for crypto keys so taking a photo or copy & pasting the information may be risky. Also note that if you lose this information, it may be impossible to get back into your wallet. Once you’ve written down the words and their corresponding numbers, click NEXT.
- Metamask will ask you to enter your recovery phrase to make sure you recorded it correctly. If not, click BACK and try again. Once successful, click ALL DONE.
Connecting Metamask to the LAMINA1 Betanet
Once you have a Metamask account connected to the Ethereum Mainnet, we can connect to the LAMINA1 Betanet.
- Click on the circular account image within Metamask and click on SETTINGS.
- Click on NETWORKS and then ADD NETWORK.
- You’ll see a list of built-in networks, ignore these and click ADD A NETWORK MANUALLY at the bottom.
- Enter in the information as displayed below using https://rpc-betanet.lamina1.com/ext/bc/C/rpc for the RPC URL
- Hit SAVE and you should now be connected to the LAMINA1 Betanet. Head to the Discord Faucet to get some L1 Betanet tokens!

NOTE:
If your Metamask wallet was previously connected to the LAMINA1 Testnet, you will have to first disconnect from this network on Metamask before connecting to the LAMINA1 Betanet. To do this:
- Tap the gear icon in the tab bar of Metamask to open the settings menu.
- Find 'Networks' in the settings menu.
- You'll now see a list of the networks you've previously added to your MetaMask. Tap on LAMINA1 Testnet. Then tap 'Delete' at the bottom of the screen
- From there, navigate to the 'Advanced' tab bar in the settings menu, and click the red 'Clear activity tab data' button. This will reset your account.
- You should now be able to connect to LAMINA1 Betanet using the details screenshotted above.
Importing an Existing Wallet to Your Metamask Account
You can import an existing wallet (including one generated by the L1 Staking Wallet) to Metamask using a recovery phrase that you previously set up. This process looks different depending on whether you already have an account setup in Metamask and you’re adding a new one or if you’re adding an account to a fresh installation of Metamask.
Importing first wallet to new Metamask installation
The only way to import a wallet to a new Metamask installation is using a recovery phrase.
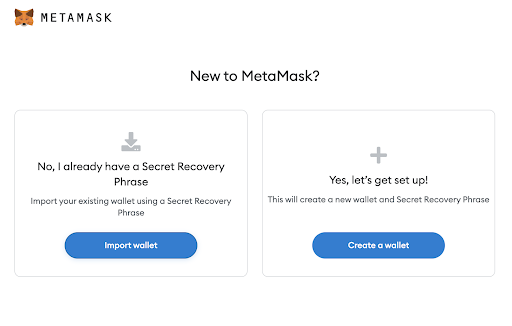
- On the “New to MetaMask screen” select IMPORT WALLET.
- You’ll now be faced with the unfortunate task of typing in each of the words in your recovery phrase. If you’re coming from the L1 Staking Wallet, then you’ll likely have 24 recovery words and you’ll need to choose that from the drop down box. Once you enter in all the words, you’ll be asked to enter a password so that you can save your account and avoid doing this again within this browser. Make sure the password is not easily guessed and make sure you don’t lose or forget it, as nobody can help you recover it. This password is not tied to an email or to your identity. It is stored locally on the browser and ensures that anyone who gains access to your computer can’t easily access your wallet without it. If you lose it, you’ll need to use your recovery phrase to access your wallet in Metamask.
If you entered your recovery phrase correctly, you should now be connected to the Ethereum Mainnet with your imported account. Next, you’ll want to connect to the LAMINA1 Betanet.
Importing an Additional Wallet to an Existing Metamask Installation
If you already have Metamask installed with an account set up you can easily add additional accounts using an exported private key. Learn how to export your private key from the L1 Staking Wallet.
- Within Metamask, click on the circular account icon and select IMPORT ACCOUNT.
- Paste your exported private key into this field and select IMPORT and you’re done. You should take a second to copy some random text using COMMAND-V or CONTROL-V so that your private key isn’t sitting in your clipboard.
Exporting From Metamask
You can export your private key from Metamask to easily import it into the L1 Staking Wallet or into a separate Metamask installation.
- Make sure you’re signed into you Metamask account
- Within Metmask, click on the three vertical dots in the top right of the window and select ACCOUNT DETAILS.
- Select EXPORT PRIVATE KEY and enter your password.
Your private key should now be displayed. When you’re finished, make sure you close this window and clear your clipboard by copying some random text.